


If you’re considering IVF in Thailand, one of the first things you might wonder is, “How long will the process take?” That’s a fair question, especially if you’re coming from abroad and need to plan travel, time off work, or extended stays. Understanding the step-by-step timeline can help ease uncertainty, reduce stress, and give you a sense of control.
This article will walk you through a typical IVF cycle in Thailand, broken down week by week. Whether you’re a local patient or traveling internationally, we’ll explain what happens at each stage, from the first consultation to the final pregnancy test, so you know exactly what to expect, how long it might take, and how to prepare.
Pre-Treatment Planning (Weeks -4 to -1) (Before IVF Begins)
Before your IVF cycle officially begins, there’s a preparation phase that sets the foundation for a successful treatment. This phase usually starts about 3 to 4 weeks before ovarian stimulation. If you’re traveling from overseas, this is the ideal time to complete initial steps remotely.
Fertility Consultation and Testing
Whether you’re in Thailand or abroad, your first step will likely be an online or in-person consultation with a fertility specialist. This is when your medical history is reviewed, and initial fertility tests are scheduled.
Typical evaluations include:
- Hormone testing: Bloodwork to check levels like AMH (which estimates your egg reserve), FSH, LH, estrogen, prolactin, and thyroid hormones.
- Ultrasound scan: To assess ovarian follicles and uterus structure.
- Semen analysis: To check sperm count, motility, and morphology for your partner, if applicable.
Depending on your medical history, your doctor may also recommend additional tests, such as infectious disease screening or genetic carrier testing.
Coordinating from Abroad
For international patients, many of these assessments can be completed at home before traveling to Thailand.
A few things to prepare in advance:
- Medical records or test results from previous treatments
- A flexible travel window of about 2–3 weeks (for those undergoing fresh embryo transfer)
- Support with hotel, transportation, or translation, if needed
If you’re planning on a frozen embryo transfer in a later cycle, your initial trip may be shorter.

Step 1: Ovarian Stimulation (Approximately Days 2–12)
Once your cycle is confirmed and the treatment officially begins, the first major step is ovarian stimulation. This stage usually lasts 10 to 14 days and requires daily hormone injections to encourage your ovaries to produce multiple mature eggs.
How It Works
- Daily injections: You’ll take fertility medications (often Gonal-F, Menopur, or similar) at the same time each day. These medications stimulate your ovaries to grow multiple follicles instead of just one.
- Monitoring: Every few days, you’ll have an ultrasound and blood test to check how your follicles are developing. These quick check-ins help your doctor adjust your medication dose as needed.
- Trigger shot: When the follicles are ready, you’ll receive a final injection (called a “trigger shot”) to prepare the eggs for collection.
Most women tolerate this phase well, though mild side effects like bloating, breast tenderness, or mood swings are common. The Lifespan Birth team provides detailed instructions and support at each step, and for international patients, our nurses help coordinate appointments and medication pickup with ease.
A Note for International Visitors
If you’re flying into Thailand specifically for IVF, plan to arrive just before your period starts. Many patients choose to complete pre-cycle testing at home and begin stimulation within a day or two of arrival.
Step 2: Egg Retrieval (Day 13–15 of Cycle)
Once your follicles reach the right size, it’s time for egg retrieval. This is a key milestone in the IVF process and is carefully timed for the best results.
The Trigger Shot and Why Timing Matters
You’ll receive a final injection, often called the “trigger shot”, about 36 hours before the egg retrieval. This injection helps the eggs mature just in time for collection. Precise timing is crucial here. Your doctor will guide you on exactly when to take the shot, usually in the evening, and schedule retrieval for two mornings later.
What to Expect During Egg Collection
- Outpatient procedure: Egg retrieval is done under light sedation. You’ll be asleep but it’s not major surgery.
- Duration: The entire procedure usually takes around 20 to 30 minutes.
- Recovery: Most people rest for a few hours afterward and feel back to normal by the next day. Mild cramping or spotting is common.
For international patients, this is when you’ll want to keep a flexible schedule. Flights or activities should be kept light around this point. We will give you personalized updates throughout this stage, so you always know where you are in the process. You can also learn more about what happens after retrieval in our week-by-week IVF recovery guide.
You won’t need to stay overnight, and if you’re traveling with a partner, they’ll usually provide their sperm sample the same day, either by appointment or ahead of time through freezing.
Step 3: Fertilization and Embryo Development (Days 14–19 of Cycle)
After your eggs are retrieved, the next stage takes place in the lab. It’s a behind-the-scenes process, but it’s one of the most important parts of your IVF cycle.
How Fertilization Happens
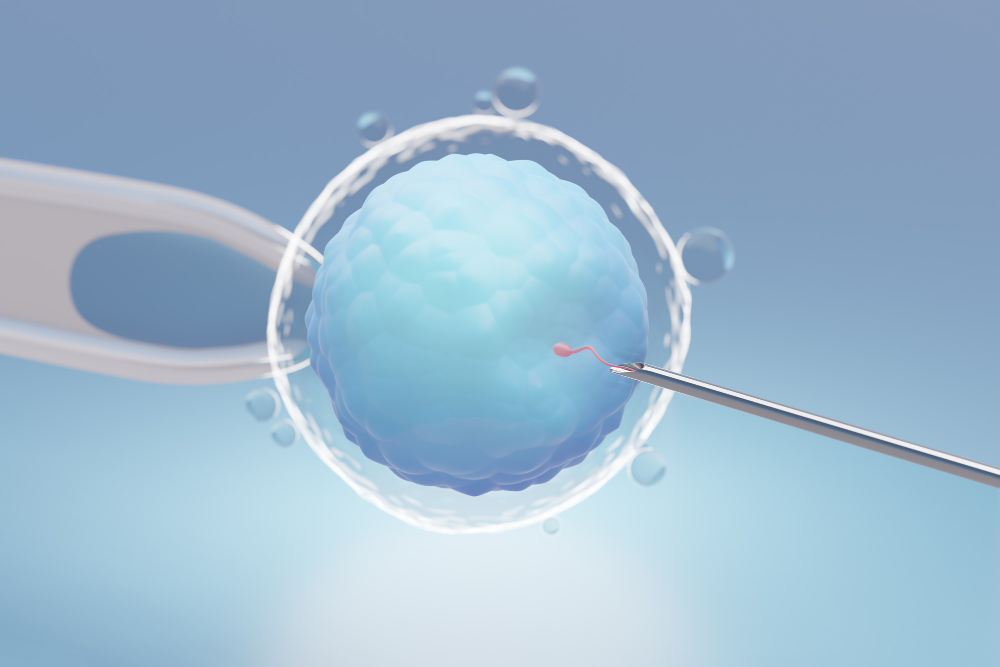
In most cases, fertilization is done using ICSI (Intracytoplasmic Sperm Injection). This means a single sperm is carefully injected into each mature egg to maximize fertilization chances.
- Within 24 hours, you’ll receive an update on how many eggs successfully fertilized.
- Not all mature eggs will fertilize or continue developing, which is completely normal.
Monitoring Embryo Development
The embryos are then cultured in the lab for several days, usually between 5 to 6 days. Each embryo is monitored for:
- Cell division patterns
- Growth rate
- Appearance and structure
By Day 5 (sometimes Day 6), the best embryos are graded and either prepared for transfer or frozen for later use. This stage gives your care team key insight into embryo quality, which plays a big role in your treatment plan.
What Happens to Extra Embryos?
If you have more than one healthy embryo, the extras can be:
- Frozen for future use (called embryo cryopreservation)
- Sent for testing if you’ve chosen PGT (Preimplantation Genetic Testing)

Frozen embryos can be transferred in a future cycle, giving you additional chances without repeating the stimulation and retrieval steps.
Want to learn more about how embryo quality is determined? Our article on Next-Generation Sequencing (NGS) explains how advanced embryo testing works and when it might be helpful.
Step 4: Embryo Transfer (Day 5 or Later)
Embryo transfer is one of the simplest and most hopeful steps in the IVF journey. Whether you’re doing a fresh or frozen cycle, this is when the embryo is placed directly into your uterus.
What’s the Difference Between Fresh and Frozen Transfer?
- Fresh transfer typically happens on Day 5, just a few days after egg retrieval. It’s ideal when the uterus and hormone levels are ready to support implantation.
- Frozen embryo transfer (FET) is often used when:
- Genetic testing is being done
- Hormone levels need time to settle
- You’re planning a later trip or need more recovery time after retrieval
With FET, the timeline is more flexible. The transfer is scheduled in a new cycle when your body is fully prepared. For more information, see our article on Fresh vs. Frozen Embryo Transfer.
What to Expect on Transfer Day
- The procedure is painless and takes less than 10 minutes.
- No anesthesia is needed. Most patients say it feels similar to a pap smear.
- You’ll rest briefly after the transfer, then return to your usual activities, though gentle movement and rest are encouraged.
Step 5: The Ten-Days Wait and Pregnancy Testing
Once your embryo has been transferred, it’s time to wait. This period is commonly called the “two-week wait” and can be one of the most emotionally challenging parts of the IVF cycle. While nothing major is happening on the outside, your body is doing important work behind the scenes.
Coping With the Wait
It’s normal to feel a mix of hope, anxiety, and impatience during this phase. You may be tempted to look for early signs of pregnancy, but keep in mind:
- Mild cramping or bloating is common and doesn’t mean anything definitive.
- Breast tenderness, fatigue, or mood swings could be due to progesterone support, not pregnancy.
- Spotting can happen in early pregnancy or as part of the cycle.
What helps during this time:
- Keep a simple daily routine
- Stay hydrated and well-nourished
- Try light walks, meditation, or gentle activities
- Limit pregnancy test kits. It’s best to wait for the clinic’s scheduled blood test
Your Pregnancy Test
- Usually scheduled 10 to 14 days after embryo transfer
- Done with a beta-hCG blood test, which is more accurate than home urine tests
- If positive, your clinic may repeat the test in 2–3 days to confirm the rise in hormone levels
At Lifespan Birth, we support you through every phase of your IVF journey in Thailand. Whether you’re local or visiting from overseas, our team provides expert care, personalized timelines, and the reassurance you need to take your next step with confidence.